"At a mile distant their thousand hooves were stuttering thunder, coming at a rate that frightened a man - they were an awe inspiring sight, galloping through the red haze - knee to knee and horse to horse - the dying sun glinting on bayonet points..." Trooper Ion Idriess
The Australian Light Horse Studies Centre aims to present an accurate history as chroniclers of early Australian military developments from 1899 to 1920.
The Australian Light Horse Studies Centre site holds over 12,000 entries and is growing daily.
Contact:Australian Light Horse Studies CentreLet us hear your story:
You can tell your story, make a comment or ask for help on our Australian Light Horse Studies Centre Forum called:
WARNING: This site contains: names, information and images of deceased people; and, language which may be considered inappropriate today.
Tuesday, 3 March 2009
605th Machine Gun Company War Diary, 23 to 27 July 1916 Topic: Gm - Bk - 605 MGC
German 605th Machine Gun Company (MGC)
War Diary, 23 to 27 July 1916
605th Machine Gun Company War Diary, 23 to 27 July 1916
The entries
23.VII.16:
An English plane came early this morning had circled twice over our camp. We replenish our supplies here. We moved off at 6 p.m. from Bir el Abd to Hod el Dababis and arrived at 8.30 p.m. Here there is an old English well which yields only salt and bitter water. We pitched our camp on a little hill in the vicinity of the little palm grove.
24.VII.16:
The first move today was to dig a new well. In order to get less salty water one has to dig fresh wells every few days. Early and late today we were visited by English planes. We slaughtered today a sheep we had brought from Bir Seba and in addition we got rice, etc.
25.Vll.16:
Today a German had to go with pack camels to Bir Abd in the morning in order to get supplies free the Turkish supply depot there for our Turkish details. Anew well was dug to-day.
26.VII.16:
Nothing new today.
27.Vll.16:
Today a German had to go to Bir Abd for German supplies, Turkish supplies, i.e. only biscuit and barley for camels and horses. Today
Bert Schramm's Diary, 3 March 1919 Topic: Diary - Schramm
Diaries of AIF Servicemen
Bert Schramm
During part of the course of his military service with the AIF, 2823 Private Herbert Leslie Schramm, a farmer from White's River, near Tumby Bay on the Eyre Peninsular, kept a diary of his life. Bert was not a man of letters so this diary was produced with great effort on his behalf. Bert made a promise to his sweetheart, Lucy Solley, that he would do so after he received the blank pocket notebook wherein these entries are found. As a Brigade Scout since September 1918, he took a lead part in the September 1918 breakout by the Allied forces in Palestine. Bert's diary entries are placed alongside those of the 9th Light Horse Regiment to which he belonged and to the 3rd Light Horse Brigade to which the 9th LHR was attached. On this basis we can follow Bert in the context of his formation.
Bert Schramm's Diary, 3 March 1919
Bert Schramm's Handwritten Diary, 2 - 4 March 1919
[Click on page for a larger print version.]
Diaries
Bert Schramm
Monday, March 3, 1919
Bert Schramm's Location - HMT Ellenga, at sea.
Bert Schramm's Diary - The rest of the Brigade came on board today but the weather is terribly rough again. I doubt if we will leave port.
9th Light Horse Regiment War Diary - 0300 Baggage train moved out.
Main troops train following two hours later arriving at platform near Kantara East 1230. Baggage train proceeded over the canal bridge and onto Egyptian State Railways.
Regiment crossed to the West Bank of the canal the first time since July 1916.
Lunched at Mrs Chisholm's and entrained at 1445 and moved 1520 arriving Moascar at 1620.
The Regiment took over the 4th Light Horse Brigade Training Regiment's camping area.
Darley
Darley, TH, With the Ninth Light Horse in the Great War, Adelaide, Hassell Press, 1924.
Suez Canal Attack, Egypt, Official British History Account, Pt 8 Topic: BatzS - Suez 1915
Suez Canal Attack
Egypt, January 28 - February 3, 1915
Official British History Account, Pt 8
The following is an extract from:
MacMunn, G., and Falls, C., Military Operations Egypt & Palestine - From the Outbreak of War with Germany to June 1917, London, 1928, pp. 46 - 50.
Chapter III
THE DAYS SUCCEEDING THE ATTACK.
To the astonishment of the garrison of the central 4 Feb. sector, expecting a renewal of the attack, it was discovered when day broke that the bulk of the Turkish force had disappeared. There were, however, at least some snipers south of Tussum Post, about mile-post 48.3, whence shots had been fired during the night. Br.-General Geoghegan ordered Captain L. F. A. Cochran to advance north along the east bank with two companies 92nd Punjabis from Serapeum Post and clear the area between it and Tussum.
Captain Cochran moved along the bank with one company, extending the other widely on his right to cut off the enemy's retreat to the east or north-east. At 8.40 a.m. he reached a hummock, on ascending which his company was fired on by a party of the enemy 120 yards away. His men lay down and returned the fire. Five minutes later some fifty Turks jumped up from their trench, holding their rifles butt uppermost, while one who looked like an officer waved something white. Captain Cochran advanced towards them, signalling to them with his hand to come over. A few unarmed Turks responded, then firing broke 4 Feb. out again and several Sepoys fell. There is no evidence of deliberate treachery in this affair. The Turks were divided in their intentions, and in any case the display of a white flag is more properly a request for a parley than a signal of surrender.
Major Z. N. Howard, brigade-major of the 22nd Indian Brigade, who had been watching from the west bank, saw that the number of the Turks was considerable and that they were strongly entrenched. He galloped back to Serapeum, whence Br.-General Geoghegan despatched a company from each of the 27th 2 and 62nd Punjabis and 128th Pioneers, [These two regiments belonged to the 31st Indian Brigade, in general reserve at Moascar, and the companies were part of the reinforcements brought up the previous afternoon.], under the command of Major Maclachlan, to Captain Cochran's assistance. A fire fight of about an hour followed, but, just as the British detachment was about to charge, the enemy surrendered. Six officers and 292 men, of whom 52 were seriously wounded, were captured, with three machine guns. The dead found in the position numbered 59, among them being the German staff officer who had supervised the crossing, Hauptmann von dem Hagen.
Opposite Ismailia and Qantara it was found that the enemy's trenches were deserted. At noon Br.-General W. A. Watson, commanding the Imperial Service Cavalry Brigade, with his own brigade, two infantry battalions and an Indian mountain battery, moved out from Ismailia Ferry Post. Seven miles north-east of Tussum a body of the enemy, estimated at three or four regiments, was seen. There was no sign of a general retreat, though further north a body of infantry was observed moving eastwards. The reconnaissance returned to the bridgehead after taking 25 prisoners and 70 camels, part of the Turkish water column.
On the morning of the 5th February aerial reconnaissance discovered that the enemy opposite the 2nd Sector was concentrated east of Bir Habeita in his old camp, upon which bombs were dropped. This force was subsequently seen to deploy and advance some distance as if about to renew the attack, but it passed out of sight into a valley and did not again emerge. To the north the enemy's right column was seen withdrawing through Qatiya, on the Mediterranean route. "To the south a small detachment of New Zealand Infantry, the 2/7th Gurkhas, a squadron of Imperial Service Cavalry, and a battery of East Lancashire Artillery, encountered 7 miles north-east of Esh Shatt a body of about 100 Turks, which fell back at its approach. On the 6th February mounted patrols from Qantara found Ed Dueidar evacuated by the Turks but were fired on by Bedouin. A camp of about a regiment was located at Rigum, east of the Great Bitter Lake, and another south-east of it at Moiya Harab. By the 10th February the only enemy reported in the neighbourhood of the Suez Canal was a body of 400 at Rigum.
No counter-offensive, it will be seen, was launched on the morning of the 4th February, when it was discovered that the enemy had fallen back from the neighbourhood of the Canal. The opportunity for the destruction of the Turkish central force unfortunately could not be taken. In the first place, though there were 70,000 troops in Egypt, only the Indian infantry brigades, and not all of them, were highly trained, while it was necessary to retain considerable strength in Cairo and elsewhere. The only point in the central Sector at which there were facilities for moving troops quickly to the east bank was at the floating bridge at Ismailia, the ferries being very slow and limited in carrying power for the purpose. The mounted troops at General Wilson's disposal on the morning of the 4th February were the Imperial Service Cavalry Brigade and the eight companies of the Bikanir Camel Corps. Certain squadrons and companies of these formations were distributed among the three sectors of the defence, the remainder being held in the neighbourhood of the bridge, over which the cavalry brigade made its reconnaissance on the afternoon of the 4th, as previously recorded. Late on the 3rd February Sir J. Maxwell ordered the Yeomanry stationed in Cairo [This unbrigaded force consisted of the Hertfordshire Yeomanry, the Westminster Dragoons, and one squadron Duke of Lancaster's Own], to move by train next morning to Ismailia, where it arrived on the evening of the 4th, but even then the cavalry consisted of 16 squadrons only, most of them, particularly the Indian troops, far from advanced in training. There were no water convoys in existence, the only water-carrying transport being the pack animals for water carriage in the first-line transport of the Indian units. The, force was therefore unsuitable in both composition and equipment for a counterstroke beyond the immediate vicinity of the Canal.
What was still more important - for, had an offensive policy been contemplated, there would have been time to have organized camel or donkey water transport before the enemy's advance - was that Sir J. Maxwell had been warned by Lord Kitchener not to risk a reverse, which would have had far-reaching effects. It had therefore been decided that, unless an exceptional opportunity offered itself, only local counter-attacks, followed by pursuit up to a distance of 10 miles, were to be attempted. Another factor was uncertainty as to the enemy's strength and intentions. Thus, on the 6th February, orders issued for a reconnaissance by a force of all arms from the Ferry Post were cancelled on receipt of information from agents that the enemy expected considerable reinforcements. The Turks were in fact on that date in full retreat, but it was not until the middle of the month that Sir J. Maxwell was assured that the troops which he had reason to suppose might be in reserve had not left Beersheba. The inability of the intelligence services to discover that these reserves had not crossed the frontier was largely due to the break-down of the hardworked French seaplanes, those which attempted at this critical moment to reconnoitre Beersheba failing owing to mechanical trouble. For over a fortnight they had been flying practically from dawn to dusk. On the 19th January El Arish was reconnoitred, on the 22nd Lieutenant de Vaisseau Delage dropped bombs on a camp at Bir el Abd, was forced to descend into the sea owing to engine trouble, and was brought back by a torpedo boat to Port Said. On the 23rd Lieutenant de Vaisseau de Sazieu reported columns between El Auja and Kossaima and 10,000 men at Beersheba, returning with numerous bullet-holes in his wings (Paul Chack: "On se bat sur Mer," p. 216).
Traffic on the Canal was suspended for a few nights and during the daylight hours of the 3rd February; otherwise communications with the East were not disturbed by the attack. Nor were the British casualties heavy, the total being 163, including ten naval, most of them suffered by the Hardinge.
Killed
British.
Indian.
Egyptian.
Officers
2
1
1
Other Ranks
2
24
2
Wounded
British.
Indian.
Egyptian
Officers
7
1
Other Ranks
11
109
2
[One civilian was wounded, the Canal Company's pilot, Mr. George Carew. After having had a leg shot off and an arm broken, he brought the Hardinge into the Timsah. He was awarded the Legion of Honour by the French Government.]
The losses of the enemy are difficult to fix with precision, but they were estimated by British Headquarters at over 2,000. [2 Between 30th January and 9th February 716 prisoners were captured ; between 28th January and 4th February 238 dead were buried, while a number of Turks were drowned in the Canal. The figures given by Kress ("Sinai" i, p. 16) are 192 killed, 371 wounded and 727 missing. These figures probably only refer to the central column, while it never appears to have been the custom of the Turkish command to record casualties suffered by their Bedouin allies and other irregulars. Prisoners reported that there were 200 killed opposite Qantara, probably Bedouin for the most part.]
These losses were not great, taking into consideration the strength of the force and the hazardous nature of its enterprise. The defeat suffered by the enemy was, however, a blow to Turkish prestige, though its damaging effect was lessened by the fact that the expedition had been able to disengage itself and return unmolested to its base. In Egypt the effect of the action was excellent, Sir J. Maxwell and the High Commissioner finding their difficulties much lightened. Turkey had fallen in the estimation of her admirers, while those whose sympathies were with the British, above all the Egyptian Government, were relieved of fears regarding their situation and confirmed in the attitude they had adopted.
1st Australian Armoured Car Section - THE BATTLE WITH THE KURDISH BANDITS - Part 2 Topic: AIF - Cars
1st AUSTRALIAN ARMOURED CAR SECTION, AIF
THE BATTLE WITH THE KURDISH BANDITS
Part 2
Below is a transcription from a manuscript submitted by Captain E.H. James called "The Motor Patrol". It is lodged in the AWM as AWM 224MSS 209. This is Part 2.
THE BATTLE WITH THE KURDISH BANDITS - Part 2
While this little running fight was taking place, the men on the caravan who had been held up were yelling with glee and excitement and when they saw their late aggressors lying on the ground they rushed up to our chaps and began patting them on the back while the Armenian who came with us was apparently a hero for all time among his compatriots.
By the time the shooting was over and we had collected the spoils to return to the people who had lost it, and had picked up one of the brigands who was only half dead to take back to the town, it was getting dark. So we thought it was time to get back to make our report. We turned for home again and the caravan followed along after us.
Before we reached Ain Tab however, we were met by a large crowd of the townspeople coming down the road to meet us. They had heard all the shooting down the road and this noise had been increased by the echoes in the mountains as each shot was repeated backwards and forwards from hill to hill until it must have sounded like a general engagement to the people in the town. We felt quite elated on reaching the town to be told that the tribe we had exterminated had been preying on travellers for years and they had been a thorn in the side of the Turks right through the war even interfering with their army transport.
Hitherto, all attempts to trace or run them down had been ineffective with the result that they had got bold enough to attack quite large convoys. We handed over the wounded man to the Turkish Authorities and we heard afterwards that they had their own methods of dealing with him. They put their "third degree" across him and got information as to the village he came from and where they kept their loot etc. Anyhow, we believe the man died a day or so afterwards.
After this little episode the Australians were looked upon as quite a lot of little tin gods by the Turks and local inhabitants. The Turkish Commandant wished to have the members of the Patrol decorated with a Turkish medal of some description, but of course it was not allowed for British troops to accept decorations from an enemy country. However, he insisted on the writer accepting as a souvenir a decoration of his own, which he had received from his own Government.
After tea that evening the sentry in front of No. 1 Light Car Patrol's quarters was surprised to see a large deputation arrive headed by the interpreter or the "Interrupter" as he was known by the troops. He explained to the sentry that the deputation consisted of the principal Armenians of the town and the head man or patriarch who had come down to express their thanks to the men who had delivered their countryman from the brigands. He also explained that it was the custom there to express their gratitude by their head man kissing the victim on the forehead. At this there was much amusement among the rest of the troops who were lining up to see what the excitement was all about.
The Commandant was appealed to, but he only grinned and said that the ordeal must be gone through otherwise the town would be offended for evermore. One man suggested that he would go through with it if they sent their daughters up instead, but apparently that was not allowed. Finally the five victims were lined up by their mates, while the patriarch solemnly carried out his duty to the accompaniment of yells of laughter from the onlookers. After it was over it was discovered that one of the men had bribed a substitute to take his place by offering him his week's issue of rum. The Ain Tab scrap was the last shooting the Patrol did although shortly afterwards a detachment was sent up into the mountains to augment No. 7 Patrol (The Scotties) who were at Marash as it was rumoured that the Inhabitants in that district were talking of rising up and driving the small British garrisons back into the Sea. However, the threat was never put into execution.
Lagnicourt, France, April 15, 1917 Topic: BatzWF - Westn Front
Lagnicourt
France, 15 April 1917
Allied front-line with Lagnicourt on the horizon.
Lagnicourt, a village about 3.5 kilometres in front of the Hindenburg Line in northern France, which on 15 April 1917 became the scene for a major German counter-attack. Noting the thinness with which part of the British Fifth Army front was being held - both as a measure to increase reserves needed for the main British thrust at Areas and by the local concentration entailed by operations against Bullecourt (q.v) the commander of the German XIV Reserve Corps (General Otto von Moser) decided to launch a counterstroke. The brunt of this attack fell on the 1st Australian Division holding ground along twelve kilometres of front.
Attacking with the greater part of four divisions (23 battalions!) before dawn, the Germans pushed forward to seize seven villages in front of their line. Their object was to hold these only for the day, capturing or destroying the artillery and supplies found here before retiring again that night. The thrust quickly brought the enemy into Lagnicourt, behind which the 1st Division's batteries were located. The village was overrun, as were several batteries west of there, before the attackers moved against Noreuil further up the valley where massed batteries were also located.
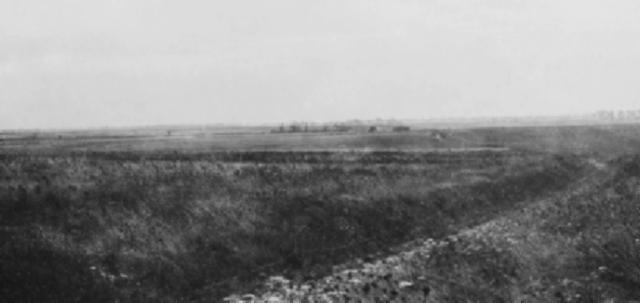
A destroyed gun captured by the Prussian Guards.
Four Australian battalions in support or reserve about Lagnicourt - little more than 4,000 men as against some 16,000 Germans in this area - counter-attacked so vigorously shortly after 7 a.m. that the enemy was driven out of the village. Recovering 21 guns which the enemy had captured and held for two hours, it was found that only five of these had been damaged. The German foray was thus defeated. Australian casualties were 1,010, including 300 taken prisoner, whereas the enemy's losses amounted to 2,313, of whom 362 were captured.
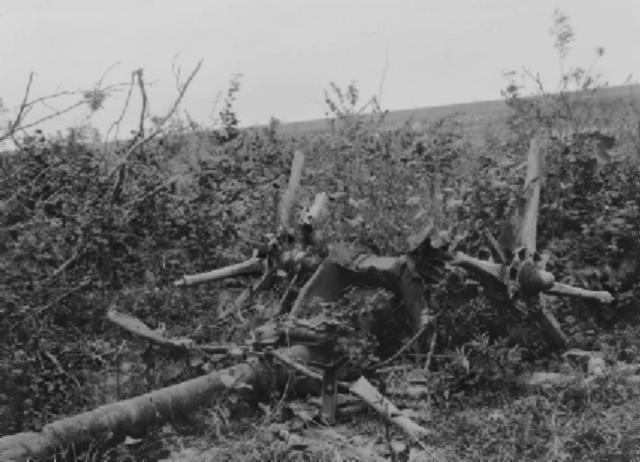
The ruined church at Lagnicourt.
Extracted from the book produced by Chris Coulthard-Clark, Where Australians Fought - The Encyclopaedia of Australia's Battles, Allen and Unwin, Sydney, 1998, pp. 125-126.
From the New York Times, 17 April 1917.
By Philip Gibbs
What happened at Lagnicourt yesterday is one of the bloodiest episodes in all this long tale of slaughter. At 4:30, before daybreak, the enemy made a very heavy attack upon the British lines where they are far beyond the old system of trenches and in real open warfare of the old style, which I, for one, never believed would come again. The enemy's lines were protected with a new belt of barbed wire, without which he can never stay on any kind of ground. But it was this which proved his undoing.
His massed attack against the Australian troops had a brief success, but the battalions of Prussian Guards charging in waves broke through the forward posts and drove a deep wedge into the British positions. Here they stayed for a time, doing what damage they could, searching around for prisoners and waiting perhaps for reserves to renew and strengthen the impetus of their attack. But the Australian staff officers were swift in preparing and delivering a counterblow which fell upon the enemy at 7:30. Companies of Australians swept forward, and with irresistible spirit flung themselves upon the Prussians, forcing them to retreat.
They fell back in an oblique line from their way of advance, forced deliberately that way by the pressure and direction of the Australian attack. At the same time the British batteries opened fire upon them with shrapnel. As they ran, more and more panic-stricken, toward their old lines, the greatest disaster befell them for they found themselves cut off by their own wire, those great broad belts of sharp spiked strands which they had planted to bar the British off.
What happened then was just an appalling slaughter. The Australian infantry used their rifles as never rifles had been used since the first weeks of the war when the aid British regulars of the First Expeditionary Force lay down at Le Cateau on the way of their retreat and fired into the advancing tide of Germans so that they fell in lines. Yesterday in that early hour of the morning the Australian riflemen fired into the same kind of target of massed men not far away, so each shot found its mark.
The Prussians struggled frantically to tear their way through the wire to climb over it, crawl under it. They cursed and screamed, ran up and down each line, each in turn until they fell clean. They fell so that the dead bodies were piled upon dead bodies in long lines of mortality before and in the midst of that spiked wire. They fell and hung across its strands. The cries of the wounded, long, tragic wails, rose high above the roar of rifle fire and bursting shrapnel, and the Australian soldiers, quiet and grim, shot on and on till each man fired a hundred rounds, till more than 1,500 German corpses lay on the field at Lagnicourt. Large numbers of prisoners were taken, wounded and unwounded, and five Prussian regiments have been identified.
The Prussian Guard has always suffered from the British troops as some dire fatality. At Ypres, at Contalmaison, in several of the Somme battles, they were cut to pieces, but this massacre at Lagnicourt is the worst episode in their history, and it will be remembered by the German people as a black and fearful thing.
Additional References cited by Chris Coulthard-Clark:
C.E.W. Bean, (1933), The Australian Imperial Force in France 1917, Sydney: Angus & Robertson.
The Australian Light Horse Studies Centre is a not for profit and non profit group whose sole aim is to write the early history of the Australian Light Horse from 1900
- 1920. It is privately funded and the information is provided by the individuals within the group and while permission for the use of the material has been given for this
site for these items by various donors, the residual and actual copyright for these items, should there be any, resides exclusively with the donors. The information on
this site is freely available for private research use only and if used as such, should be appropriately acknowledged. To assist in this process, each item has a citation
attached at the bottom for referencing purposes.
Please Note: No express or implied permission is given for commercial use of the information contained within this site.
A note to copyright holders
The Australian Light Horse Studies Centre has made every endeavour to contact copyright holders of material digitised for this blog and website and where
appropriate, permission is still being sought for these items. Where replies were not received, or where the copyright owner has not been able to be traced, or where
the permission is still being sought, the Australian Light Horse Studies Centre has decided, in good faith, to proceed with digitisation and publication. Australian Light
Horse Studies Centre would be happy to hear from copyright owners at any time to discuss usage of this item.