« May 2024 »
S M T W T F S
1 2 3 4
5 6 7 8 9 10 11
12 13 14 15 16 17 18
19 20 21 22 23 24 25
26 27 28 29 30 31
You are not logged in. Log in


Search the site:


powered by FreeFind
Volunteer with us.

Entries by Topic All topics
A Latest Site News
A - Using the Site
AAA Volunteers
AAB-Education Centre
AAC-Film Clips
AAC-Photo Albums
AIF & MEF & EEF
AIF - Lighthorse
AIF - ALH - A to Z
AIF - DMC
AIF - DMC - Or Bat
AIF - DMC - Anzac MD
AIF - DMC - Aus MD
AIF - DMC - British
AIF - DMC - BWI
AIF - DMC - French
AIF - DMC - Indian
AIF - DMC - Italian
AIF - DMC - Medical
AIF - DMC - Remounts
AIF - DMC - Scouts
AIF - DMC - Sigs
AIF - DMC - Sigs AirlnS
AIF - DMC - 1 Sig Sqn
AIF - DMC - 2 Sig Sqn
AIF - DMC - Eng
AIF - DMC - Eng 1FSE
AIF - DMC - Eng 2FSE
AIF - DMC - GSR
AIF - 1B - 1 LHB
AIF - 1B - 6 MVS
AIF - 1B - 1 LHMGS
AIF - 1B - 1 Sig Trp
AIF - 1B - 1 LHFA
AIF - 1B - 1 LHR
AIF - 1B - 2 LHR
AIF - 1B - 3 LHR  
AIF - 2B - 2 LHB
AIF - 2B - 7 MVS
AIF - 2B - 2 LHFA
AIF - 2B - 2 LHMGS
AIF - 2B - 2 Sig Trp
AIF - 2B - 5 LHR
AIF - 2B - 6 LHR
AIF - 2B - 7 LHR
AIF - 3B - 3 LHB
AIF - 3B - 8 MVS
AIF - 3B - 3 LHB Sigs
AIF - 3B - 3 LHFA
AIF - 3B - 3 LHMGS
AIF - 3B - 3 Sig Trp
AIF - 3B - 8 LHR
AIF - 3B - 9 LHR
AIF - 3B - 10 LHR
AIF - 4B - 4 LHB
AIF - 4B - 4 Sig Trp
AIF - 4B - 9 MVS
AIF - 4B - 4 LHFA
AIF - 4B - 4 LHMGS
AIF - 4B - 4 LHR
AIF - 4B - 11 LHR
AIF - 4B - 12 LHR
AIF - 5B - 5 LHB
AIF - 5B - 10 MVS
AIF - 5B - 5 LHFA
AIF - 5B - 5 Sig Trp
AIF - 5B - ICC
AIF - 5B - 14 LHR
AIF - 5B - 15 LHR
AIF - 5B - 1er Regt
AIF - 5B - 2 NZMGS
AIF - AASC
AIF - Aboriginal LH
AIF - Badges
AIF - Cars
AIF - Chinese LH
AIF - Double Sqns
AIF - Engineers
AIF - Fr - 22 Corps
AIF - Fr - 13 LHR
AIF - Honour Roll
AIF - HQ - 3rd Echelon
AIF - Marching Songs
AIF - Misc Topics
AIF - NZMRB
AIF - NZMRB - AMR
AIF - NZMRB - CMR
AIF - NZMRB - EFT
AIF - NZMRB - NZMFA
AIF - NZMRB - NZMGS
AIF - NZMRB - OMR
AIF - NZMRB - Sig-Trp
AIF - NZMRB - WMR
AIF - Ships
AIF - Ships - Encountr
AIF - Ships - Una
AIF - WFF
AIF - Wireless Sqn
Battles
BatzA - Australia
BatzA - Broken Hill
BatzA - Liverpool
BatzA - Merivale
BatzB - Boer War
BatzB - Bakenlaagte
BatzB - Belmont
BatzB - Bothaville
BatzB - Buffels Hoek
BatzB - Coetzees Drift
BatzB - Diamond Hill
BatzB - Driefontein
BatzB - Elands
BatzB - Graspan
BatzB - Grobelaar
BatzB - Grootvallier
BatzB - Hartebestfontn
BatzB - Houtnek
BatzB - Karee Siding
BatzB - Kimberley
BatzB - Koster River
BatzB - Leeuw Kop
BatzB - Mafeking
BatzB - Magersfontein
BatzB - Modder River
BatzB - Onverwacht
BatzB - Paardeberg
BatzB - Palmietfontein
BatzB - Pink Hill
BatzB - Poplar Grove
BatzB - Rhenoster
BatzB - Sannahs Post
BatzB - Slingersfontn
BatzB - Stinkhoutbm
BatzB - Sunnyside
BatzB - Wilmansrust
BatzB - Wolvekuil
BatzB - Zand River
BatzG - Gallipoli
BatzG - Anzac
BatzG - Aug 1915
BatzG - Baby 700
BatzG - Evacuation
BatzG - Hill 60
BatzG - Hill 971
BatzG - Krithia
BatzG - Lone Pine
BatzG - Nek
BatzJ - Jordan Valley
BatzJ - 1st Amman
BatzJ - 2nd Amman
BatzJ - Abu Tellul
BatzJ - Es Salt
BatzJ - JV Maps
BatzJ - Ziza
BatzM - Mespot
BatzM - Baghdad
BatzM - Ctesiphon
BatzM - Daur
BatzM - Kurna
BatzM - Kut el Amara
BatzM - Ramadi
BatzN - Naval
BatzN - AE1
BatzN - Cocos Is
BatzN - Heligoland
BatzN - Marmara
BatzN - Zeebrugge
BatzN - Zeppelin L43
BatzNG - Bitapaka
BatzO - Other
BatzO - Baku
BatzO - Egypt 1919
BatzO - Emptsa
BatzO - Karawaran
BatzO - Peitang
BatzO - Wassa
BatzP - Palestine
BatzP - 1st Gaza
BatzP - 2nd Gaza
BatzP - 3rd Gaza
BatzP - Aleppo
BatzP - Amwas
BatzP - Ayun Kara
BatzP - Bald Hill
BatzP - Balin
BatzP - Beersheba
BatzP - Berkusieh
BatzP - Damascus
BatzP - El Auja
BatzP - El Buggar
BatzP - El Burj
BatzP - Haifa
BatzP - Huj
BatzP - JB Yakub
BatzP - Kaukab
BatzP - Khan Kusseir
BatzP - Khuweilfe
BatzP - Kuneitra
BatzP - Megiddo
BatzP - Nablus
BatzP - Rafa
BatzP - Sasa
BatzP - Semakh
BatzP - Sheria
BatzP - Surafend
BatzP - Wadi Fara
BatzS - Sinai
BatzS - Bir el Abd
BatzS - El Arish
BatzS - El Mazar
BatzS - El Qatiya
BatzS - Jifjafa
BatzS - Magdhaba
BatzS - Maghara
BatzS - Romani
BatzS - Suez 1915
BatzSe - Senussi
BatzWF - Westn Front
BW - Boer War
BW - NSW
BW - NSW - 1ACH
BW - NSW - 1NSWMR
BW - NSW - 2NSWMR
BW - NSW - 3ACH
BW - NSW - 3NSWIB
BW - NSW - 3NSWMR
BW - NSW - 5ACH
BW - NSW - A Bty RAA
BW - NSW - AAMC
BW - NSW - Aust H
BW - NSW - Lancers
BW - NSW - NSW Inf
BW - NSW - NSWCBC
BW - NSW - NSWIB
BW - NSW - NSWMR_A
BW - NZ
BW - Qld
BW - Qld - 1ACH
BW - Qld - 1QMI
BW - Qld - 2QMI
BW - Qld - 3ACH
BW - Qld - 3QMI
BW - Qld - 4QIB
BW - Qld - 5QIB
BW - Qld - 6QIB
BW - Qld - 7ACH
BW - QLD - AAMC
BW - SA
BW - SA - 1SAMR
BW - SA - 2ACH
BW - SA - 2SAMR
BW - SA - 3SACB
BW - SA - 4ACH
BW - SA - 4SAIB
BW - SA - 5SAIB
BW - SA - 6SAIB
BW - SA - 8ACH
BW - SA - AAMC
BW - Tas
BW - Tas - 1ACH
BW - Tas - 1TIB
BW - Tas - 1TMI
BW - Tas - 2TB
BW - Tas - 2TIB
BW - Tas - 3ACH
BW - Tas - 8ACH
BW - Vic
BW - Vic - 1VMI
BW - Vic - 2ACH
BW - Vic - 2VMR
BW - Vic - 3VB
BW - Vic - 4ACH
BW - Vic - 4VIB
BW - Vic - 5VMR
BW - Vic - 6ACH
BW - Vic - AAMC
BW - Vic - Scot H
BW - WA
BW - WA - 1WAMI
BW - WA - 2ACH
BW - WA - 2WAMI
BW - WA - 3WAB
BW - WA - 4ACH
BW - WA - 4WAMI
BW - WA - 5WAMI
BW - WA - 6WAMI
BW - WA - 8ACH
BW Gen - Campaign
BW Gen - Soldiers
BW General
Cavalry - General
Diary - Schramm
Egypt - Heliopolis
Egypt - Mena
Gen - Ataturk Pk, CNB
Gen - Australia
Gen - Legends
Gen - Query Club
Gen - St - NSW
Gen - St - Qld
Gen - St - SA
Gen - St - Tas
Gen - St - Vic
Gen - St - WA
Gm - German Items
Gm - Bk - 605 MGC
GW - 11 Nov 1918
GW - Atrocities
GW - August 1914
GW - Biographies
GW - Propaganda
GW - Spies
GW - We forgot
Militia 1899-1920
Militia - Area Officers
Militia - Inf - Infantry
Militia - Inf - 1IB
Militia - Inf - 2IB
Militia - Inf - 3IB
Militia - Inf - NSW
Militia - Inf - Qld
Militia - Inf - SA
Militia - Inf - Tas
Militia - Inf - Vic
Militia - Inf - WA
Militia - K.E.Horse
Militia - LH
Militia - LH - Regts
Militia - LH - 1LHB
Militia - LH - 2LHB
Militia - LH - 3LHB
Militia - LH - 4LHB
Militia - LH - 5LHB
Militia - LH - 6LHB
Militia - LHN - NSW
Militia - LHN - 1/7/1
Militia - LHN - 2/9/6
Militia - LHN - 3/11/7
Militia - LHN - 4/6/16
Militia - LHN - 5/4/15
Militia - LHN - 6/5/12
Militia - LHN - 28
Militia - LHQ - Qld
Militia - LHQ - 13/2
Militia - LHQ - 14/3/11
Militia - LHQ - 15/1/5
Militia - LHQ - 27/14
Militia - LHS - SA
Militia - LHS - 16/22/3
Militia - LHS - 17/23/18
Militia - LHS - 24/9
Militia - LHT - Tas
Militia - LHT - 12/26
Militia - LHV - Vic
Militia - LHV - 7/15/20
Militia - LHV - 8/16/8
Militia - LHV - 9/19
Militia - LHV - 10/13
Militia - LHV - 11/20/4
Militia - LHV - 19/17
Militia - LHV - 29
Militia - LHW - WA
Militia - LHW-18/25/10
Militia - Military Orders
Militia - Misc
MilitiaRC - Rifle Clubs
MilitiaRC - NSW
MilitiaRC - NT
MilitiaRC - Qld
MilitiaRC - SA
MilitiaRC - Tas
MilitiaRC - Vic
MilitiaRC - WA
Militiaz - New Zealand
Tk - Turkish Items
Tk - Army
Tk - Bks - Books
Tk - Bks - 1/33IR
Tk - Bks - 27th IR
Tk - Bks - Air Force
Tk - Bks - Yildirim
Tk - POWs
Wp - Weapons
Wp - Hotchkiss Cav
Wp - Hotchkiss PMG
Blog Tools
Edit your Blog
Build a Blog
RSS Feed
View Profile
Open Community
Post to this Blog
Site Index
Education Centre
LH Militia
Boer War
Transport Ships
LH Battles
ALH - Units
ALH - General
Aboriginal Light H
Weapons
Ottoman Sources

"At a mile distant their thousand hooves were stuttering thunder, coming at a rate that frightened a man - they were an awe inspiring sight, galloping through the red haze - knee to knee and horse to horse - the dying sun glinting on bayonet points..." Trooper Ion Idriess

The Australian Light Horse Studies Centre aims to present an accurate history as chroniclers of early Australian military developments from 1899 to 1920.

The Australian Light Horse Studies Centre site holds over 12,000 entries and is growing daily.

Contact: Australian Light Horse Studies Centre

Let us hear your story: You can tell your story, make a comment or ask for help on our Australian Light Horse Studies Centre Forum called:

Desert Column Forum

WARNING: This site contains: names, information and images of deceased people; and, language which may be considered inappropriate today.

Friday, 9 October 2009
3rd Australian Light Horse Regiment, Contents
Topic: AIF - 1B - 3 LHR

3rd LHR, AIF

3rd Australian Light Horse Regiment

Contents


3rd Light Horse Regiment Colour Patch


The 3rd Light Horse Regiment was composite regiment formed as part of the 1st Light Horse Brigade, 1st Contingent and attached to the Australian Division. Two squadrons were formed at Morphettville Race Track Training Camp to the west of Adelaide, South Australia, while the third squadron was raised at Brighton Camp, north west from Hobart in Tasmania.


Structure

The Australian Light Horse – Structural outline

Australian Light Horse Order of Battle


Corps

Desert Mounted Corps (DMC)


Division

Anzac Mounted Division


Brigade

1st Australian Light Horse Brigade 


Regiment

3rd Australian Light Horse Regiment, AIF, History


History

Romani

Romani, Sinai, 4-5 August 1916, 3rd LHR, AIF, War Diary Account
Romani, Sinai, 4-5 August 1916, 3rd LHR, AIF, Unit History Account
Bir el Abd
Bir el Abd, Sinai, 9 August 1916, 3rd LHR, AIF, War Diary Account
Bir el Abd, Sinai, 9 August 1916, 3rd LHR, AIF, Unit History Account 
Bir el Mazar
Bir el Mazar, Sinai, 17 September 1916, 3rd LHR, AIF, War Diary Account 
Bir el Mazar, Sinai, 17 September 1916, 3rd LHR, AIF, Unit History Account
Magdhaba
3rd ALHR, AIF, War Diary, account
3rd ALHR AIF account 

Beersheba

3rd ALHR AIF account about the fall of Beersheba

3rd ALHR, AIF, War Diary, account about the fall of Beersheba


Routine Orders

3rd LHR Routine Order No 138, 14 June 1915


Embarkation

Full Roll

Roll: A - C

Roll: D - F

Roll: G - J

Roll: K - L

Roll: M - Q

Roll: R - S

Roll: T - Z


Individual Rolls

Regimental Headquarters Section

A Squadron

B Squadron

C Squadron

Machine Gun Section

1st Reinforcement

2nd Reinforcement

3rd Reinforcement

4th Reinforcement

5th Reinforcement

6th Reinforcement Borda Group

6th Reinforcement Wandilla Group

7th Reinforcement Kanowna Group

7th Reinforcement Persia Group

8th Reinforcement Morea Group

8th Reinforcement Kyarra Group

9th Reinforcement Star Of England Group

9th Reinforcement Makarini Group

10th Reinforcement Ballarat 9 September 1915 Group

10th Reinforcement Ballarat 14 September 1915 Group

11th Reinforcement Benalla Group

11th Reinforcement Ulysses Group

11th Reinforcement Hawkes Bay Group

12th Reinforcement Ceramic Group

12th Reinforcement Geelong Group

13th Reinforcement Afric Group

13th Reinforcement Borda Group

14th Reinforcement

15th Reinforcement

16th Reinforcement

17th Reinforcement

18th Reinforcement
19th Reinforcement

20th Reinforcement

21st Reinforcement

22nd Reinforcement

23rd Reinforcement

24th Reinforcement

25th Reinforcement

26th Reinforcement Morea 20 February 1917 Group

26th Reinforcement Morea 22 February 1917 Group

27th Reinforcement

28th Reinforcement Port Lincoln Group

28th Reinforcement Kyarra Group

28th Reinforcement Commonwealth Group

29th Reinforcement Port Lincoln Group

29th Reinforcement Kyarra Group

29th Reinforcement Commonwealth Group

30th Reinforcement

31st Reinforcement Commonwealth Group

31st Reinforcement Ormonde Group

32nd Reinforcement

33rd Reinforcement

34th Reinforcement

35th Reinforcement 


Roll of Honour

3rd Australian Light Horse Regiment, Roll of Honour

Lest we forget


Further Reading:

3rd Light Horse Regiment, AIF

3rd Australian Light Horse Regiment, Roll of Honour 

Battles where Australians fought, 1899-1920


Citation: 3rd Australian Light Horse Regiment, Contents

Posted by Project Leader at 12:01 AM EADT
Updated: Wednesday, 20 January 2010 12:45 PM EAST
Thursday, 8 October 2009
3rd Australian Light Horse Regiment, AIF, Outline
Topic: AIF - 1B - 3 LHR

3rd LHR, AIF

3rd Australian Light Horse Regiment

 Outline


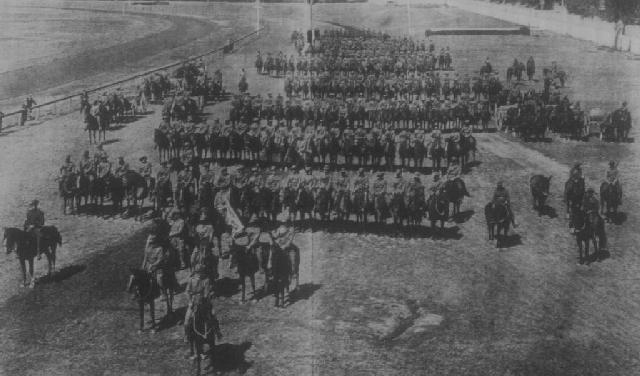
3rd Light Horse Regiment, "A" & "B" Squadrons, Public Parade at Goodwood Show Grounds, September 1914.

[From: Adelaide Observer, 26 September 1914, p. 28.]


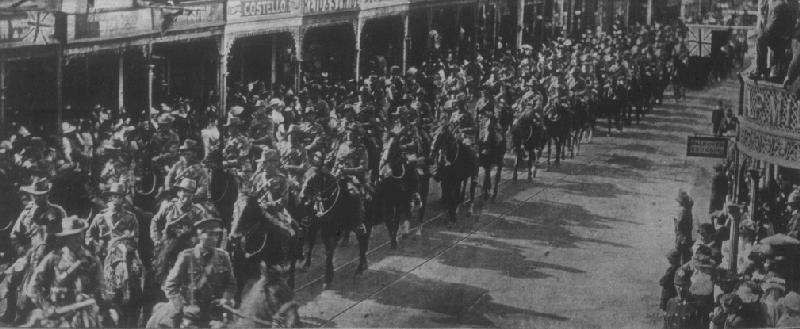
Meanwhile in Hobart, they too were preparing for a military parade which occurred two weeks later.


3rd Light Horse Regiment, "C" Squadron, Marching down Liverpool Street, Hobart, October 1914.

[From: Tasmanian Mail, 8 October 1914, p. 18.]


Outline of the 3rd Australian Light Horse Regiment, AIF


Formation

The 3rd Light Horse Regiment was composite regiment formed as part of the 1st Light Horse Brigade, 1st Contingent and attached to the Australian Division. Two squadrons were formed at Morphettville Race Track Training Camp to the west of Adelaide, South Australia, while the third squadron was raised at Brighton Camp, north west from Hobart in Tasmania. Recruits were taken on strength from on 17 August 1914. The recruits were drawn from three Militia Regiments within the 4th and 6th Military Districts which incorporated all of South Australia, the Broken Hill region of New South Wales while the men from Tasmania formed the "C" Squadron. Many of the men went from the Light Horse Militia formation into the AIF Light Horse.


"A" Squadron recruited mainly from:

the 23rd Light Horse Regiment region, South Australia.


"B" Squadron recruited mainly from:

the 24th Light Horse Regiment region, South Australia.


"C" Squadron recruited mainly from:

the 26th Light Horse Regiment region within Tasmania.


Training 


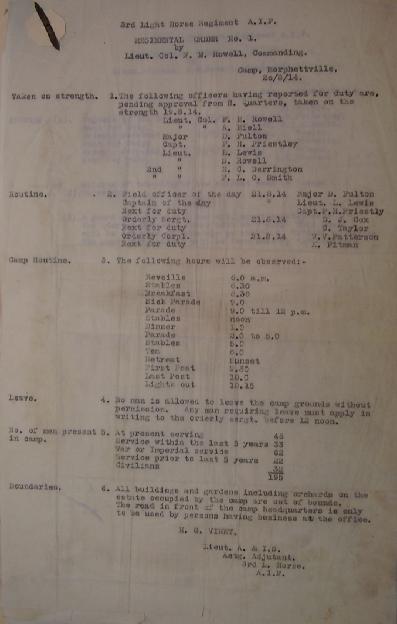
3rd Light Horse Regiment Routine Order No 1, 20 August 1914

[Click on page for larger version.]


Training of the 3rd Light Horse Regiment occurred at Morphettville Race Track Training Camp from August until September 1914. 


Embarkation

Embarkation of the 3rd Light Horse Regiment occurred in two tranches.


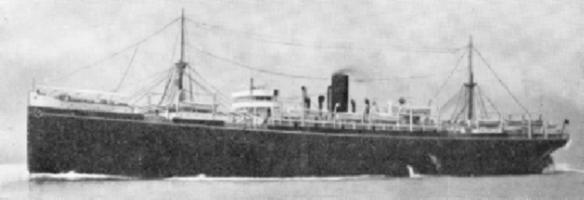
 HMAT A17 Port Lincoln

 [See: His Majesty's Australian Transports [HMAT] Ships, A17.]


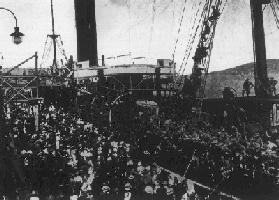
The South Australian contingent consisting of "A" and "B" Squadrons, Headquarters and the Machine Gun Section embarked on the HMAT A17 Port Lincoln from Port Adelaide, South Australia, on 20 October 1914. 


HMAT A2 Geelong at Hobart, 20 October 1914

[See: His Majesty's Australian Transports [HMAT] Ships, A2.]


On the same day but different port, "C" Squadron embarked from Hobart by HMAT A2 Geelong on 20 October 1914.

The 3rd Light Horse Regiment sailed by convoy from Albany and passed by the action against the Emden at the Cocos Islands. The two ships disembarked the 3rd Light Horse Regiment in Egypt on 9 December 1914 where it came together as a Regiment for the first time.


Colour Patch

Initially, the only colour separation of the various Australian mounted troops was by use of the pennant. The marker pennants were carried on poles to mark lines troop lines in camps in Egypt. They were not lance pennants as the Australian lancers had red over white pennants on their lances.


Pennant of the 3rd Light Horse Regiment


While this pennant was useful in distinguishing horse and troop lines, it failed to identify the individual with a unit. The AIF 1st Australian Division Standing Orders issued in December 1914 ordered the Australian Light Horse Regiments to wear a 4 inch wide [10.2cm] blue armband with the regiment name marked on the band in black lettering.

The earlier systems proved to be ineffective so to assist with identification of the men in the various units within the AIF, Divisional Order No 81 (A) Administration was issued at Mena on 8 March 1915 detailing the Colour Patch for the 3rd Light Horse Regiment as others received their colours. The colour patch was made of cloth 1¼ inches wide and 2¾ inches long and worn on the sleeve one inch below the shoulder seam. The colour patch for the 3rd Light Horse Regiment was black over white.


3rd Light Horse Regiment Colour Patch


The 3rd Light Horse Regiment carried the white Brigade colour as the lower triangle part of the colour patch, while the black unit colour was on the top. This is illustrated with the above presentation.


Gallipoli

As mounted troops, the Light Horse was considered to be unsuitable for work in Gallipoli. The mounted troops volunteered to operate as infantry and thus were sent to Gallipoli with the 3rd Light Horse Regiment landing on 12 May 1915. During their whole participation in the Gallipoli campaign, the 3rd Light Horse Regiment played a defensive role. The 3rd Light Horse Regiment left Gallipoli on 14 December 1915.


Western Frontier Force

After the return to Egypt, the 3rd Light Horse Regiment reformed and re-equipped. The reorganisation of the Light Horse led to the formation of the ANZAC Mounted Division to which the 1st Light Horse Regiment became a foundation member.

For the first five months of 1916, between January and May, the 3rd Light Horse Regiment was deployed throughout the Nile valley to defend the Egyptian economic centres from the interruption by the Senussi infiltrating from Siwa Oasis. 


Defence of Egypt

On 14 May1916, the 1st Light Horse Regiment moved to join its parent brigade, the 1st Light Horse Brigade, which was taking part in the defence of the Suez Canal. The work was hot and monotonous. they remained here until moved to the Romani region to bolster the defence of that area.


Sinai

The 1st Light Horse Brigade played an important role in beating back the Turkish invasion of the Suez Canal zone at Romani. Now known as the Battle of Romani which lasted from 4-6 August which was quickly followed by the Battle of Katia and then Bir el Abd on 9 August. All the actions in which the 1st Light Horse Regiment finally led to the defeat of the Ottoman Canal Expeditionary force and its retreat to Bir el Mazar.


Over the next few months, the 1st Light Horse Regiment took part in the Allied advance over the Sinai leading to the fall of Bir el Mazar, then El Arish followed by Bir el Magdhaba and finally Rafa in January 1917. The Ottoman forces were expelled from the Sinai and were poised to be tackled in Palestine.


Palestine

The 3rd Light Horse Regiment was assigned to protect the rail line and lines of communications for the first months of 1917. They missed the First Battle of Gaza but were back at the fron by 6 April 1917 and took part in the Second Battle of Gaza on 19 April 1917.

The 3rd Light Horse Regiment took part in the Battle of Beersheba and then the follow up actions that lasted until early January 1918. This included such actions as the advance to Jaffa.

After the fall of Jerusalem the 3rd Light Horse Regiment moved to the Jordan Valley and took parts in operations in this region. This included the taking of Jericho, the attack on Amman during 27 March - 2 April 1918 and Es Salt Raid of 30 April – 4 May 1918. It's last major action prior to the breakout was to repel the German Asien Corps attack on Abu Telllul, 14 July 1918.


Amman

At the opening of the final Allied offensive on 19 September 1918, the 1st Light Horse Regiment took part in the invasion of the Moab hills for the third time. This time Amman was captured and finally, the Ottomans called for an Armistice on 30 October 1918.


Return to Australia

After the conclusion of hostilities, the 3rd Light Horse Regiment was marked to return to Australia. Prior to that action, one of the saddest actions occurred for the Australian Lighthorsemen; they had to farewell their best friends, the horses. All the Light Horse unit horses' health was ascertained with the fit horses being transferred to the Indian Cavalry while those in poor condition were destroyed by the Veterinary units. On 16 March 1919 the 3rd Light Horse Regiment embarked from Egypt for the long voyage to Australia where the unit was disbanded. 


Commanding Officers

Lieutenant Colonel Frank Milton Rowell
Lieutenant Colonel George John Bell
Lieutenant Colonel David Fulton


 Decorations earned by the 1st Light Horse Regiment

  • 2 CMG - Companion in The Most Distinguished Order of St. Michael and St. George
  • 1 CBE - Companion of the Order of the British Empire
  • 3 DSO - Distinguished Service Orders
  • 5 MC - Military Crosses
  • 4 DCM - Distinguished Conduct Medals
  • 8 MM- Military Medals
  • 28 MID - Mentioned in Despatches
  • 2 foreign awards 


Campaigns

Gallipoli

  • Anzac
  • Defence at Anzac
  • Suvla
  • Sari Bair
  • Gallipoli 1915-1916

Egypt

  • Senussi Campaign
  • Defence of Egypt

Sinai

  • Romani
  • Magdhaba
  • Rafa 

Palestine

  • Second Battle of Gaza
  • Third Battle of Gaza
  • Beersheba
  • El Mughar
  • Nebi Samwill
  • Jerusalem
  • Jaffa
  • Jericho
  • Amman
  • Es Salt
  • Abu Tellul
  • Megiddo
  • Nablus
  • Palestine 1917-1918


Casualties suffered by the 1st Light Horse Regiment

  • 158 killed
  • 653 wounded


War Diary

The Australian War Memorial has put these on line and may be accessed here:

3rd Light Horse Regiment War Diaries.


Embarkations:

The following list details all the embarkations in support of the 3rd Light Horse Regiment, AIF, during the Great War. Each entry details the individual soldier's: rank on embarkation; full name; Declared age; last occupation held; last address as a civilian; enlistment Date; and, ultimate fate. Each man is linked to a brief military biography where ever possible. One interesting point is that many of the men listed in the embarkation roll for the 3rd Light Horse Regiment ended up in a different unit altogether. This list details the men's starting point in the AIF.

3rd Light Horse Regiment, Headquarters

Adelaide, South Australia on board HMAT A17 Port Lincoln  20 October 1914

3rd Light Horse Regiment, A Squadron

Adelaide, South Australia on board HMAT A17 Port Lincoln 20 October 1914

3rd Light Horse Regiment, B Squadron

Adelaide, South Australia on board HMAT A17 Port Lincoln 20 October 1914

3rd Light Horse Regiment, C Squadron

Hobart, Tasmania on board HMAT A2 Geelong 20 October 1914

3rd Light Horse Regiment, Machine Gun Section

Adelaide, South Australia on board HMAT A17 Port Lincoln  20 October 1914

3rd Light Horse Regiment, 1st Reinforcement

Newcastle, New South Wales on board HMAT A36 Boonah 21 December 1914

3rd Light Horse Regiment, 2nd Reinforcement

Melbourne, Victoria on board HMAT A45 Bulla 2 February 1915

3rd Light Horse Regiment, 3rd Reinforcement

Melbourne, Victoria on board HMAT A47 Mashobra 29 January 1915

3rd Light Horse Regiment, 4th Reinforcement

Adelaide, South Australia on board HMAT A17 Port Lincoln 1 April 1915

3rd Light Horse Regiment, 5th Reinforcement

Adelaide, South Australia on board HMAT A59 Botanist 2 June 1915

3rd Light Horse Regiment, 6th Reinforcement Borda Group

Adelaide, South Australia on board HMAT A30 Borda 23 June 1915

3rd Light Horse Regiment, 6th Reinforcement Wandilla Group

Melbourne, Victoria on board HMAT A62 Wandilla 17 June 1915

3rd Light Horse Regiment, 7th Reinforcement, Kanowna Group

Adelaide, South Australia on board HMAT A61 Kanowna 24 June 1915

3rd Light Horse Regiment, 7th Reinforcements Persia Group

Melbourne, Victoria on board RMS Persia 10 August 1915

3rd Light Horse Regiment, 8th Reinforcement Morea Group

3rd Light Horse Regiment, 8th Reinforcements Kyarra Group

Adelaide, South Australia on board RMS Morea 26 August 1915

Melbourne, Victoria on board HMAT A55 Kyarra 20 August 1915

3rd Light Horse Regiment, 9th Reinforcement Star of England Group

 3rd Light Horse Regiment, 9th Reinforcements Makarini Group

Adelaide, South Australia on board HMAT A15 Star Of England 21 September 1915

Melbourne, Victoria on board SS Makarini 15 September 1915

3rd Light Horse Regiment, 10th Reinforcement Ballarat 9 September Group

3rd Light Horse Regiment, 10th Reinforcements Ballarat 14 September 1915 Group

Adelaide, South Australia on board HMAT A70 Ballarat 14 September 1915

Melbourne, Victoria on board HMAT A70 Ballarat 9 September 1915

3rd Light Horse Regiment, 11th Reinforcement Benalla Group

3rd Light Horse Regiment, 11th Reinforcements Ulysses Group 

3rd Light Horse Regiment, 11th Reinforcements Hawkes Bay Group

Melbourne, Victoria on board HMAT A38 Ulysses 27 October 1915

Adelaide, South Australia on board HMAT A24 Benalla 27 October 1915

Melbourne, Victoria on board SS Hawkes Bay 28 October 1915

3rd Light Horse Regiment, 12th Reinforcement Ceramic Group

3rd Light Horse Regiment, 12th Reinforcements Geelong Group

Melbourne, Victoria on board HMAT A40 Ceramic 23 November 1915

Adelaide, South Australia on board HMAT A2 Geelong 18 November 1915

3rd Light Horse Regiment, 13th Reinforcement Afric Group

3rd Light Horse Regiment, 13th Reinforcements Borda Group

Melbourne, Victoria on board HMAT A19 Afric 5 January 1916

Adelaide, South Australia on board HMAT A30 Borda 11 January 1916

3rd Light Horse Regiment, 14th Reinforcement

Adelaide, South Australia on board HMAT A69 Warilda 10 February 1916

3rd Light Horse Regiment, 15th Reinforcement

Adelaide, South Australia on board HMAT A68 Anchises 16 March 1916

3rd Light Horse Regiment, 16th Reinforcement

Adelaide, South Australia on board HMAT A59 Botanist 26 April 1916

3rd Light Horse Regiment, 17th Reinforcement

Melbourne, Victoria on board HMAT A58 Kabinga 8 May 1916

3rd Light Horse Regiment, 18th Reinforcement

Adelaide, South Australia on board HMAT A13 Katuna 23 June 1916

3rd Light Horse Regiment, 19th Reinforcement

Adelaide, South Australia on board RMS Mongolia 13 July 1916

3rd Light Horse Regiment, 20th Reinforcement

Adelaide, South Australia on board RMS Malwa 27 July 1916

3rd Light Horse Regiment, 21st Reinforcement

Adelaide, South Australia on board RMS Mooltan 24 August 1916

3rd Light Horse Regiment, 22nd Reinforcement

Melbourne, Victoria on board HMAT A65 Clan Mcewan 9 October 1916

3rd Light Horse Regiment, 23rd Reinforcement

Adelaide, South Australia on board HMAT A45 Bulla 16 January 1917

3rd Light Horse Regiment, 24th Reinforcement

Adelaide, South Australia on board HMAT A6 Clan MacCorquodale 5 February 1917

3rd Light Horse Regiment, 25th Reinforcement

Adelaide, South Australia on board RMS Karmala 8 February 1917

3rd Light Horse Regiment, 26th Reinforcement Morea 20 February 1917 Group

3rd Light Horse Regiment, 26th Reinforcement Morea 22 February 1917 Group

Melbourne, Victoria on board RMS Morea 20 February 1917

Adelaide, South Australia on board RMS Morea 22 February 1917

3rd Light Horse Regiment, 27th Reinforcement

Sydney, New South Wales on board HMAT A15 Port Sydney 9 May 1917

3rd Light Horse Regiment, 28th Reinforcement Port Lincoln Group

3rd Light Horse Regiment, 28th Reinforcement Kyarra Group

3rd Light Horse Regiment, 28th Reinforcement Commonwealth Group

Melbourne, Victoria on board HMAT A17 Port Lincoln 22 June 1917

Melbourne, Victoria on board HMAT A55 Kyarra 7 September 1917

Melbourne, Victoria on board HMAT A73 Commonwealth 2 November 1917

3rd Light Horse Regiment, 29th Reinforcement Port Lincoln Group

3rd Light Horse Regiment, 29th Reinforcement Kyarra Group

3rd Light Horse Regiment, 29th Reinforcement Commonwealth Group

Melbourne, Victoria on board HMAT A17 Port Lincoln 22 June 1917

Melbourne, Victoria on board HMAT A55 Kyarra7 September 1917

Melbourne, Vic on board HMAT A73 Commonwealth 2 November 1917

3rd Light Horse Regiment, 30th Reinforcement

Melbourne, Victoria on board HMAT A73 Commonwealth 2 November 1917

3rd Light Horse Regiment, 31st Reinforcement Commonwealth Group

3rd Light Horse Regiment, 31st Reinforcement Ormonde Group

Melbourne, Victoria on board HMAT A73 Commonwealth 2 November 1917

Melbourne, Victoria on board RMS Ormonde 7 March 1918

3rd Light Horse Regiment, 32nd Reinforcement

Melbourne, Victoria on board HMAT A73 Commonwealth 2 November 1917

3rd Light Horse Regiment, 33rd Reinforcement

Melbourne, Victoria on board HMAT A38 Ulysses 22 December 1917

3rd Light Horse Regiment, 34th Reinforcement

Melbourne, Victoria on board RMS Ormonde 7 March 1918

3rd Light Horse Regiment, 35th Reinforcement

Melbourne, Victoria on board RMS Ormonde 7 March 1918

See: Troop transport ships for information and photographs about the various ships employed in transporting the troops to Egypt.


References:

Blackwell, FM, The Story of the 3rd Light Horse Regiment, Adelaide 1950.

Kempe, H, Participation, Melbourne 1973.

Pickering, PJ, Tasmania's A.I.F. Lighthorsemen, C Squadron, 3rd Light Horse Regiment, Hobart 2006.


Further Reading:

3rd Light Horse Regiment, AIF

3rd Australian Light Horse Regiment, Roll of Honour 

Battles where Australians fought, 1899-1920


Citation: 3rd Australian Light Horse Regiment, AIF, Outline

Posted by Project Leader at 12:01 AM EADT
Updated: Tuesday, 22 December 2009 8:12 PM EAST
Wednesday, 7 October 2009
3rd Australian Light Horse Regiment, Roll of Honour
Topic: AIF - 1B - 3 LHR

3rd LHR, AIF

3rd Australian Light Horse Regiment

Roll of Honour


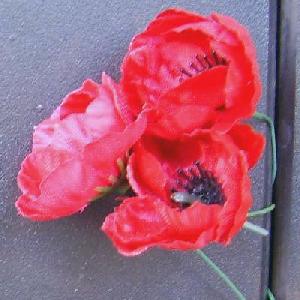
Poppies on the Roll of Honour, Australian War Memorial, Canberra


The Roll of Honour contains the names of all the men known to have served at one time with the 3rd Light Horse Regiment and gave their lives in service of Australia, whether as part of the 3rd Light Horse Regiment or another unit.


Roll of Honour


Benjamin David ALEXANDER, Killed in Action, 9 August 1916.

Alfred James ANGRAVE, Died of Wounds, 3 June 1916.

James Hamilton AYLIFFE, Died of Wounds, 7 November 1917.


Charles Ernest BAGOT, Died of Wounds, 9 November 1915 at sea.

John Arthur Alexander BAILEY, Killed in Action, 28 May 1915.

Reginald Michael BANNON, Died of Wounds, 27 October 1917.

Vivian Murray BARBER, Died of Accident, 1 November 1916.

David J. BARCLAY, Killed in Action, 4 August 1916.

Arthur John BARLOW, Killed in Action, 28 November 1916.

Frank Launsley BARNS, Died of Disease, 22 October 1918.

Henry Dundas BASHFIELD, Died of Wounds, 24 April 1917.

Victor Thomas Arthur BATTEN, Died of Disease, 11 February 1919

Alexander Hartley BAX, Died of Wounds, 30 May 1915.

Murray Charles BAX, Died of Wounds, 10 January 1917.

Horace Anthony BECK, Killed in Action, 3 May 1917.

Eric Chalcroft BELL, Killed in Action, 19 May 1915.

Leonard Cornelius BEMOLD, Died of Accident, 9 February 1916.

Charles Pryor BENNETT, Killed in Action, 9 January 1917.

John Robert BIGLANDS, Died of Wounds, 1 February 1917.

Owen Ernest Hugh BINGHAM, Killed in Action, 4 August 1916.

Arthur Leonard BIRCHETT, Died of Wounds, 28 May 1915 at sea.

Thomas Daniel BLAND, Died of Wounds, 9 May 1917.

Charles Frederick BLESING, Killed in Action, 8 October 1917.

William Belworthy BLUE, Died of Wounds, 13 October 1915.

Mervyn Stafford BLYTH, Killed in Action, 23 December 1916.

Allen Christopher BOLT, Killed in Action, 9 January 1917.

John Richard BOUNDEY, Killed in Action, 31 October 1917.

Stanley Ernest BOWYER, Killed in Action, 9 January 1917.

Francis John BRAMMALL, Died of Wounds, 30 September 1918.

Clarence Rosser BRANERGHAN, Killed in Action, 28 November 1916.

Halcombe Ferrier BROCK, Killed in Action, 2 June 1915.

Joseph BROWN, Killed in Action, 4 June 1915.

Roy William BROWN, Killed in Action, 9 January 1917.

William John BROWN, Killed in Action, 30 March 1918.

Harold Alfred BURRILL, Killed in Action, 4 August 1916.

Edwin BUTLER, Died of Wounds, 16 May 1915.

Henry Edward BUTLER, Died of Wounds, 9 January 1917.


Horace Alfred CADD, Killed in Action, 31 July 1917.

Colin Campbell CAMERON, Died of Disease, 18 November 1918.

Charles Bowcher CASS, Killed in Action, 2 September 1918.

Alexander Caird CHEAPE, Killed in Action, 1 July 1915.

Emil John Hamilton CLARKE, Killed in Action, 15 April 1917.

John Joyce CLARKE, Died of Wounds, 15 August 1915 at sea.

Frank Railton CLINCH, Killed in Action, 4 August 1916.

Charles Cahill COCKERILL, Killed in Action, 12 August 1916.

Sydney David COCKSHELL, Killed in Action, 3 May 1917.

David Henry COLES, Died of Wounds, 20 October 1917.

Leslie James CORRIGAN, Died of Disease, 24 October 1918.

Albert Victor COX, Killed in Action, 4 December 1917.

Norman Gilbert COX, Killed in Action, 4 September 1916.

Peter George CRUSE, Died of Disease, 15 August 1915.

Geoffrey Ivan CUMMINGS, Killed in Action, 11 April 1918.

Roland CURLIS, Killed in Action, 19 May 1915.


Clarence DAVIDSON, Died of Wounds, 26 June 1915.

Albert Alfred DAVIES, Died of Wounds, 25 April 1917.

Cecil Harold DAVIS, Killed in Action, 15 April 1917.

John William DAWSON, Died of Wounds, 9 January 1917.

Robert Raymond DAWSON, Killed in Action, 31 October 1917.

John Herbert DEARMAN, Died of Wounds, 31 October 1917.

Edgar Frederick DeLATOUR, Killed in Action, 23 May 1915.

Charles Matthew DICKENS, Died of Disease, 21 September 1917.

Sydney John DODSON, Killed in Action, 8 August 1918.

William DONELLAN, Killed in Action, 9 January 1917.

Michael DOODY, Killed in Action, 11 December 1916.

David DOUGLAS, Killed in Action, 1 October 1917.

John DUELL, Killed in Action, 6 August 1916.

Roy Herbert DUNHAM, Died of Wounds, 16 July 1918.


Leonard Ridgeway EASTHER, Killed in Action, 4 August 1916.

Alexander ELLIS, Died of Wounds, 4 November 1916.

Herbert John ELLIS, Died of Disease, 7 August 1915.

Arthur ETTRIDGE, Died of Wounds, 30 November 1916.


Gordon Silas FIDLER, Died of Wounds, 19 August 1916.

Lindsay McRae FIELD, Killed in Action, 19 April 1917.

George Frederick Leslie FINN, Killed in Action, 11 April 1917.

Francis Gerald FITZGERALD, Died of Disease, 31 October 1918.

William Wallace FLOOD, Died of Disease, 18 August 1918.

Sydney Frederick FOWLER, Killed in Action, 31 March 1918.

William George FOX, Killed in Action, 11 November 1917.

Roy FRANCIS, Died of Disease, 19 October 1918.

Wilfred FRENCH, Killed in Action, 1 June 1916.

Edwin Henry FRY, Killed in Action, 16 October 1917.


Lawrence Mark GATTENBY, Died of Wounds, 14 January 1917.

Joseph George Lodwick GILBERT, Died of Wounds, 12 November 1917.

Thomas John GILLINGS, Died of Disease, 1 May 1918.

Gordon Powell GOODE, Died of Disease, 17 October 1915.

Harry GREEN, Died of Wounds, 1 November 1917.

Martin GREEN, Died of Disease, 20 October 1918.

Vernon Cameron GREGORY, Killed in Action, 19 April 1917.

David Edgar GRIFFITHS, Died of Disease, 23 January 1919.


Reginald HALL, Killed in Action, 15 April 1917.

Frederick HARVEY, Died of Accident, 12 November 1917.

James Alexander HAY, Died of Disease, 27 May 1915.

Frank Henry HICKS, Died of Disease, 10 October 1918.

Arthur Poyntz HIRST, Died of Accident, 21 June 1916.

Thomas Roydon HOGARTH, Died of Wounds, 1 November 1917.

Albert George HOLLICK, Died of Disease, 6 September 1915 at sea.

Arthur Ernest HOLT, Died of Disease, 27 September 1915.

Edmund John HOWARD, Killed in Action, 4 August 1916.

James Tolbouis HOWELL, Killed in Action, 16 August 1916.

Thomas Arthur HUTCHINS, Killed in Action, 14 May 1915.


Fergus Stanley IBBOTT, Died of Wounds, 6 August 1916.

Kenneth INGLIS, Died of Wounds, 5 June 1918.

Andrew John Cheyne INKSTER, Died of Wounds, 30 November 1916.

William John IVETT, Died of Disease, 9 November 1918.


Clement Belmore JACKA, Died of Accident, 16 October 1918.

Ernest JACKSON, Died of Wounds, 30 May 1915 at sea.

Sydney Arthur JACOBS, Died of Wounds, 1 June 1916.

John JAMISON, Died of Disease, 18 August 1915.

James Terence JENNER, Killed in Action, 3 May 1917.

Arthur John JOHNSTON, Died of Disease, 7 June 1916.

Walter William Robert JONES, Killed in Action, 9 August 1916.


Francis KELLY, Killed in Action, 31 October 1917.

John James KELLY, Died of Wounds, 6 May 1917.

William KEMP, Died of Wounds, 27 April 1917.

Basil KERSLAKE, Died of Wounds, 5 August 1916.

Phillip Darby KILLICOAT, Died of Wounds, 19 September 1915.

Fred Johnston KNOWLING, Died of Wounds, 12 November 1917.


Cyrus Havelock LADE, Died of Wounds, 23 April 1917.

Marshall John LADNER, Died of Disease, 4 June 1918.

Newton Frederick Seymour LANE, Killed in Action, 8 June 1917.

Oscar Michael LAWLER, Killed in Action, 22 December 1917.

William Nelson LAWRENCE, Killed in Action, 2 April 1917.

George Gray LAWSON, Died of Disease, 22 January 1917.

Frederick LEAHY, Killed in Action, 11 October 1917.

Donald Strangfield LEE, Killed in Action, 20 September 1917.

Bert Clive LINCOLN, Killed in Action, 30 March 1918 .

Walter LITCHFIELD, Killed in Action, 31 October 1917.

Edward Whitaker LOWNDES, Died of Wounds, 28 May 1915.

Wilford LUDBEY, Died of Wounds, 6 August 1916.

Arthur LYONS, Died of Wounds, 15 September 1915 at sea.

William Charles LYONS, Died of Accident, 9 March 1916.


Norman Harold McBRIDE, Killed in Action, 22 December 1917.

Reginald Joseph McCULLOUGH, Died of Disease, 30 December 1919 .

Alfred McDONALD, Died of Wounds, 3 June 1916.

Murdock McDONALD, Died of Wounds, 7 July 1916.

John Robert McINTOSH, Died of Wounds, 15 April 1917.

Norman Alexander Peter McINTYRE, Died of Disease, 22 October 1918 at sea.

Norman McKAY, Died of Disease, 20 August 1917.

Edward McPHERSON, Died of Wounds, 11 November 1917.

Alfred MELVILLE, Killed in Action, 9 August 1916.

Joseph Charles MERRITT, Died of Disease, 12 October 1918.

Stanley Roy MORGAN, Killed in Action, 11 April 1917.

Hervey Ira MORSE, Died of Wounds, 26 February 1917.

Malcolm MUDGE, Died of Disease, 11 October 1918.

Donald Stewart MUNRO, Killed in Action, 1 June 1916.

Douglas Beattie MURPHY, Died of Wounds, 25 June 1916.


Sydney John NELSON, Died of Disease, 24 October 1918.

Henrie Clarence NICHOLAS, Killed in Action, 4 August 1916.

Donald NICHOLSON, Died of Disease, 11 October 1918.

George NOBLE, Killed in Action, 14 November 1917.

Oliver NORMAN, Died of Wounds, 2 April 1918.


Lawrence Patrick O'DONNELL, Died of Wounds, 5 April 1918.

John Leslie OPIE, Died of Wounds, 31 July 1917.

John OSBORN, Died of Wounds, 1 November 1917.


William Stanley PAGE, Killed in Action, 28 November 1916.

Hubert PATERSON, Killed in Action, 11 August 1917.

Andrew Cameron PAUL, Killed in Action, 4 June 1915.

Bertram Wellesley PEARSE, Died of Wounds, 25 May 1915.

Claude Mellnoote PERRY, Killed in Action, 9 October 1917.

William Gordon PHYSICK, Died of Wounds, 28 October 1917.

Astley Ford PILKINGTON, Died of Wounds, 15 May 1915 at sea.

Frank Tasman POKE, Killed in Action, 15 August 1918.

John Daniel POTTER, Killed in Action, 1 June 1916.

William Lewis POWELL, Died of Disease, 26 October 1918.

Arthur Wakefield PRICE, Killed in Action, 28 September 1917.

Philip Edward PRIME, Died of Disease, 28 October 1918.

Andrew James PRIOR, Died of Wounds, 2 November 1917.

Noel Phillips PRITCHARD, Died of Wounds, 16 August 1918.

Cecil Roy PURKIS, Died of Disease, 15 February 1919.


Joseph Charles RADNELL, Killed in Action, 4 August 1916.

Charles Wilson RAGLESS, Killed in Action, 10 February 1917.

John Ernest RAMSAY, Killed in Action, 15 August 1918.

Clem RANFORD, Killed in Action, 31 October 1917.

Joseph Marmion RANFORD, Killed in Action, 21 June 1916.

Oswald Lewis RAYMOND, Died of Accident, 13 September 1917.

William Charles REID, Killed in Action, 11 April 1917.

George Ferdinand RICHARDSON, Killed in Action, 10 October 1917.

Richard Leslie ROADS, Died of Wounds, 21 June 1915 at sea.

Alan Chamberlin RODGERS, Died of Wounds, 2 November 1917.

Benjamin ROGERS, Died of Wounds, 1 June 1916.

Ernest Arthur ROGERS, Killed in Action, 9 January 1917.

John Stanley ROGERS, Killed in Action, 5 August 1917.

Leslie ROSS, Died of Accident, 7 April 1915.

Frank Milton ROWELL, Died of Disease, 8 August 1915 at sea.

Clancy Vernon RUFFELS, Died of Disease, 12 October 1918.

Victor Francis RULE, Died of Disease, 13 October 1918.


Frank Garfield SAINT, Died of Disease, 24 October 1918.

Douglas Elliott SCOTT, Died of Wounds, 20 May 1915 at sea.

Hobart Alfred SEYMOUR, Died of Wounds, 12 August 1915.

William Cecil SIBLEY, Died of Disease, 22 December 1918.

Arnold Lealand SIVIOUR, Killed in Action, 14 July 1918.

Ernest George SMITH, Died of Accident, 12 February 1916.

Percival Thorne SMITH, Died of Wounds, 6 June 1915 at sea.

Wilfred SMITH, Killed in Action, 4 August 1916.

Albert STANDJAN, Died of Wounds, 8 August 1915.

Gordon John STAUDE, Died of Disease, 25 October 1918.

William Leonard STEVENS, Died of Wounds, 16 April 1917.

Maxwell Graham STEWART, Died of Disease, 31 July 1917.

Sydney SULLIVAN, Died of Wounds, 25 April 1918.

Thomas John SYMES, Killed in Action, 1 June 1916.


Harold Hammond TAYLOR, Died of Disease, 13 June 1916.

Tom Braithwaite TAYLOR, Killed in Action, 9 January 1917.

Percy Croft TEMPLAR, Died of Wounds, 15 October 1917.

Walter Wesley TILBROOK, Killed in Action, 1 April 1918.

Gordon TIMBRELL, Killed in Action, 1 July 1915.

Gladstone James TODD, Died of Wounds, 20 April 1917.

Alfred Gibbs TOLMAN, Killed in Action, 4 August 1916.

Charles Albert TONQUEST, Died of Wounds, 1 June 1916.

Archibald Stuart TREGILGAS, Died of Wounds, 1 November 1917.

Walter Charles Douglas TREGONNING, Died of Disease, 25 January 1917.

William Ernest TRENORDEN, Killed in Action, 11 April 1917.

Henry Charles TROWBRIDGE, Died of Wounds, 1 November 1917.

Arthur Harold TUCKER, Died of Wounds, 22 December 1917.


Thomas WALKER, Killed in Action, 12 August 1915.

William John WALTER, Died of Disease, 20 March 1919.

Herbert Alexander WARD, Killed in Action, 9 August 1916.

Stanley WATKINS, Killed in Action, 16 October 1917.

Douglas Linly Roy WATSON, Killed in Action, 19 May 1915.

Roderick Noel White WEAVER, Killed in Action, 4 August 1916.

Tasman Laurence WEBSTER, Killed in Action, 31 May 1915.

Geoffrey Erskine WELLS, Died of Wounds, 6 October 1917.

William Horace WELLS, Killed in Action, 11 April 1918.

John Vernon WHITE, Died of Wounds, 12 January 1917.

Gordon Percy WHITFIELD, Died of Disease, 19 July 1915.

Arthur Ernest WILCOX, Killed in Action, 19 February 1917.

Lewis Frederick WILKINSON, Died of Wounds, 1 October 1917.

George Charles WILLIAMS, Killed in Action, 26 May 1915 .

Russell WILLIAMS, Killed in Action, 17 October 1917.

George James Argent WING, Died of Disease, 6 February 1915.

John Charles WISHART, Killed in Action, 6 August 1915.

Harold Victor WOODS, Died of Wounds, 12 November 1917.

Stewart Chris WOOLNOUGH, Died of Disease, 22 December 1916.


Lest We Forget

 

Acknowledgement: Many thanks to Steve Becker who provided much of the raw material that appears in this item.
 

Further Reading:

3rd Australian Light Horse Regiment, AIF

Battles where Australians fought, 1899-1920


Citation: 3rd Australian Light Horse Regiment, Roll of Honour

Posted by Project Leader at 12:01 AM EADT
Updated: Friday, 26 March 2010 12:56 PM EADT
Sunday, 9 August 2009
Bir el Abd, Sinai, 9 August 1916, 3rd LHR, AIF, Unit History Account
Topic: AIF - 1B - 3 LHR

Bir el Abd

Sinai, 9 August 1916

3rd LHR, AIF, Unit History Account


Frank M Blackwell and DR Douglas produced a unit history in 1950 called The Story of the 3rd Australian Light Horse Regiment. This story has subsequently been reprinted by Lieutenant Colonel Neil C. Smith AM with upgraded information in which included a section specifically related to the battle of Beersheba and extracted below.

Blackwell, FM, The Story of the 3rd Australian Light Horse Regiment, (Adelaide 1950), pp. 71 - 72:


On the 8th two-thirds of the Brigade moved out made up as follows, an arrangement necessitated by the recent loss of men and horses. Each Regiment supplied two squadrons totalling 236 men, and only the fittest horses were taken. The remainder of the Brigade remained in camp under Lieut.-Col. Fulton.

Major Lewis with "A" Squadron and part of "C," was attached to the 1st Light Horse Regiment. Major Bell, with "B" Squadron and remainder of C, was attached to 2nd Light Horse Regiment.

Thus constituted, the Brigade left Katia, which had now been evacuated by the Turks, and a halt was made here for two hours to water and feed the horses.

"A" and "B" Squadrons left at 9.30 p.m. and moved via Oghratina to Hod el Nisha, where the advanced guard got into touch with the enemy at 6 a.m. on the following morning.

The Brigade then moved forward and took up a position on a ridge some two miles north-west of Bir el Abd. During the advance the troops came under enemy shellfire from two 5.9 in. guns.

From this position an attempt to advance was made at 11.30 a.m., but this failed owing to the concentration of fire from enemy machine guns.

At 1.30 p.m. the enemy made an advance on the left of our position which was subjected to an accurate bombardment by high explosive shells and shrapnel, inflicting several casualties.

A short time previously the enemy had located our supporting artillery battery and inflicted heavy casualties on the gun teams. Some considerable delay occurred in consequence in salving the guns, and our troops had to remain in a very exposed position while the guns were being withdrawn. This completed, the Regiment withdrew at 4 p.m., reaching Oghratina at midnight, moving on next morning to Hod e1 Negiliat, where a stay was made until the 15th, arriving back at Romani at 2.50 p.m. on that date.

The Turkish rearguard proved at Bir el Abd that they still had plenty of fight left, and this section was always afterwards regarded as a most unpleasant one, due mainly to the high explosive shells which the Turkish artillery supplied.


Further Reading:

3rd Light Horse Regiment, AIF

3rd Australian Light Horse Regiment, Roll of Honour

Battle of Romani, Sinai, August 4 to 5, 1916 

Bir el Abd, Sinai, 9 August 1916

Battles where Australians fought, 1899-1920


Citation: Bir el Abd, Sinai, 9 August 1916, 3rd LHR, AIF, Unit History Account

Posted by Project Leader at 12:01 AM EADT
Updated: Friday, 18 September 2009 9:02 PM EADT
Wednesday, 5 August 2009
Romani, Sinai, 4-5 August 1916, 3rd LHR, AIF, War Diary Account
Topic: AIF - 1B - 3 LHR

Battle of Romani

Sinai, 4 - 5 August 1916

3rd LHR, AIF, War Diary Account


War Diary account of the 3rd LHR, AIF.


The transcription:


Wednesday, August 2, 1916 –

Brigade left Romani and moved to Katia at 0230. Third Regiment found left flank guard and advanced through Katia and Er Raban driving back enemy patrols and holding line ½ mile North East Er Raban to 1¼ East of Qatia Cemetery. The enemy were very active particularly on our left flank. Casualties – 1 Officer, 2 men wounded 1 horse killed. Their mountain batteries fired some 60 rounds at our aeroplanes. Left Katia 1930 arrived Romani 2230.


Thursday, August 3, 1916 –
Owing to the enemy having occupied Katia on the night of 2/3 August the 1st Light Horse Brigade held an outpost line from No 1 Infantry Post just south of Katir Gannit to Hod el Enna. The 3rd Regiment took up the new line at 1800 holding from No 1 Post exclusive to Mt Meredith inclusive. The 2nd Light Horse Brigade moved through our lines at 2230 from Katia. The scouts of the advancing Turks ran into our Cossack Posts at 2340.


Friday, August 4, 1916 –
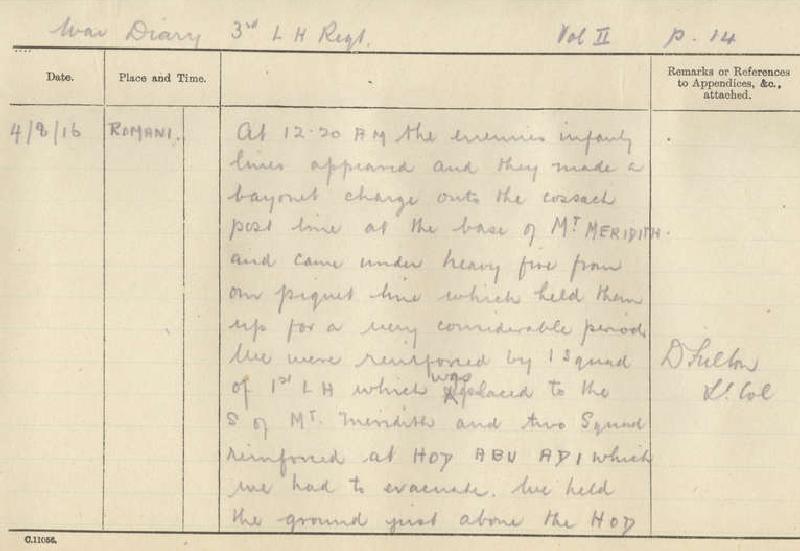
At 0020 the enemy’s infantry line appeared and they made a bayonet charge onto the Cossack Post line at the base of Mt Meredith and came under heavy fire from our piquet line which held them up for a very considerable period. We were reinforced by 1 Squadron of 1st Light horse Regiment which was placed to the south of Mt Meredith and two Squadrons reinforced at Hod Abu Adi which we had to evacuate. We held the ground just above the Hod at 0400 but the Turks were now swarming up Mt Meredith from the South West and dominated our position. The poured heavy rifle, machine gun and shrapnel fire onto us as daylight at daylight and we were compelled to fall back at 0530 as our right flank was enfiladed owing to the 1st and 2nd Regiments being compelled to withdraw. We fell back onto Wellington Ridge where we were reinforced by the 2nd Light Horse Brigade and a company of Kings Own Scottish Borderers. Here the Regiment reformed less “B” Squadron who had been compelled to fall back behind the wire of the Infantry Posts and were afterwards used as Divisional Troops by General Chauvel.

On Reforming we joined up with the 2nd Regiment but missed the 1st Light Horse Brigade Headquarters, so we moved to the right flank which was all the time being turned. We moved towards Hod el Diyuk and were joined by the 6th Light Horse Regiment and Colonel Royston who took command. We then extended to the right and held all the high ground covering the railway and ultimately stopped the turning movement.

The New Zealand Mounted Rifles Brigade and the 3rd Light Horse Brigade and the 5th Mounted Brigade came from the direction of Duidar and attacked from the South West squeezing the enemy on three sides and capturing 600 prisoners. The whole line then swung round to our left and advanced towards Mr Meredith and Hod el Enna for two miles and then halted and bivouacked in the position for the night.


Saturday, August 5, 1916 –
At 0430 a general advance was ordered. This Regiment acted as Brigade Reserve. The enemy were retiring on Katia. We advanced to Bir Sagid without opposition and passed many prisoners and abandoned stores coming in. At 1500 a general advance by 5 Brigades was ordered on Katia which was quickly reached, but on coming into action we were met by heavy machine gun and shell fire. The 3rd Regiment was in the centre and failed to cross the swamp. The flank attack failed and the Brigades were withdrawn at dusk 1900. We arrived at Romani at 2300. We were absent from camp 59 hours, were moving constant and fighting most of the time. The majority of the horses were without a drink during the whole period. Casualties: 14 Killed. 31 Wounded. 4 Missing. 95 horses killed or missing.


Roll of Honour
David (Junior) BARCLAY

Owen Ernest Hugh BINGHAM

Harold Alfred BURRILL

John DUELL

Leonard Ridgeway EASTHER

Edmund John HOWARD

Fergus Stanley IBBOTT

Fred INGLIS
Basil KERSLAKE
Wilfred LUDBEY

Henrie Clarence NICHOLAS

Joseph Marmion RANFORD

Wilfred SMITH

Alfred Gibbs TOLMAN

Roderick Noel White WEAVER


Lest we forget


Further Reading:

3rd Light Horse Regiment, AIF

3rd Australian Light Horse Regiment, Roll of Honour

Battle of Romani, Sinai, August 4 to 5, 1916 

Bir el Abd, Sinai, 9 August 1916

Battles where Australians fought, 1899-1920


Citation: Romani, Sinai, 4-5 August 1916, 3rd LHR, AIF, War Diary Account

Posted by Project Leader at 12:01 AM EADT
Updated: Monday, 19 October 2009 12:40 PM EADT

Newer | Latest | Older

Full Site Index


powered by FreeFind
Let us hear your story: You can tell your story, make a comment or ask for help on our forum.

Desert Column Forum

A note on copyright

The Australian Light Horse Studies Centre is a not for profit and non profit group whose sole aim is to write the early history of the Australian Light Horse from 1900 - 1920. It is privately funded and the information is provided by the individuals within the group and while permission for the use of the material has been given for this site for these items by various donors, the residual and actual copyright for these items, should there be any, resides exclusively with the donors. The information on this site is freely available for private research use only and if used as such, should be appropriately acknowledged. To assist in this process, each item has a citation attached at the bottom for referencing purposes.

Please Note: No express or implied permission is given for commercial use of the information contained within this site.

A note to copyright holders

The Australian Light Horse Studies Centre has made every endeavour to contact copyright holders of material digitised for this blog and website and where appropriate, permission is still being sought for these items. Where replies were not received, or where the copyright owner has not been able to be traced, or where the permission is still being sought, the Australian Light Horse Studies Centre has decided, in good faith, to proceed with digitisation and publication. Australian Light Horse Studies Centre would be happy to hear from copyright owners at any time to discuss usage of this item.

Contact

Australian Light Horse Studies Centre

eXTReMe Tracker